Python には、GUI (グラフィカル ユーザー インターフェイス) を開発するための複数のオプションが用意されています。すべての GUI メソッドの中で、tkinter が最もよく使用されるメソッドです。これは、Python に同梱されている Tk GUI ツールキットへの標準 Python インターフェイスです。 Python Tkinter GUI アプリケーションを作成する最も速くて簡単な方法です。 Tkinter を使用して GUI を作成するのは簡単です。
目次
Tkinter Python アプリを作成するには、次の基本手順に従います。
- tkinter モジュールをインポートする : これは、他のモジュールをインポートするのと同じように行われます。 パイソン 。 Python 2.x ではモジュールの名前は「Tkinter」ですが、Python 3.x では「tkinter」であることに注意してください。
- メインウィンドウ(コンテナ)の作成 : メイン ウィンドウは、後で追加するすべての GUI 要素のコンテナとして機能します。
- メインウィンドウにウィジェットを追加する : ボタン、ラベル、入力フィールドなどのウィジェットをメイン ウィンドウにいくつでも追加して、必要に応じてインターフェイスをデザインできます。
- ウィジェットにイベントトリガーを適用する : イベント トリガーをウィジェットにアタッチして、ウィジェットがユーザー インタラクションにどのように応答するかを定義できます。
最初の Tkinter GUI アプリケーションを作成する
GUI で Python アプリケーションを作成する際にユーザーが覚えておく必要がある主な方法が 2 つあります。
unixのトップコマンド
タカ()
メインウィンドウを作成するために、tkinter はメソッド「Tk(screenName=None,baseName=None,className=’Tk’, useTk=1)」を提供します。ウィンドウの名前を変更するには、className を目的の名前に変更します。アプリケーションのメイン ウィンドウの作成に使用される基本コードは次のとおりです。
メインループ()
mainloop() という名前で知られるメソッドがあり、アプリケーションを実行する準備ができたときに使用されます。 mainloop() は、アプリケーションを実行し、イベントの発生を待機し、ウィンドウが閉じられていない限りイベントを処理するために使用される無限ループです。
例
Python3 import tkinter m = tkinter.Tk() ''' widgets are added here ''' m.mainloop()>
出力

Tkinter ウィジェット
tkinter アプリケーションに配置できるウィジェットが多数あります。主要なウィジェットのいくつかを以下に説明します。
1. ラベル
これは、コードに従っていつでも更新できるテキストや画像を配置できる表示ボックスを指します。一般的な構文は次のとおりです。
w=Label(master, option=value) master is the parameter used to represent the parent window.>Python3
from tkinter import * root = Tk() w = Label(root, text='GeeksForGeeks.org!') w.pack() root.mainloop()>
出力

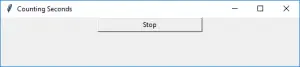
2. ボタン
アプリケーションにボタンを追加するには、このウィジェットを使用します。一般的な構文は次のとおりです。
w=Button(master, option=value)>
master は、親ウィンドウを表すために使用されるパラメータです。ボタンの形式を変更するために使用されるオプションが多数あります。オプションの数は、カンマで区切られたパラメータとして渡すことができます。Python3>
>
> import tkinter as tk r = tk.Tk() r.title('Counting Seconds') button = tk.Button(r, text='Stop', width=25, command=r.destroy) button.pack() r.mainloop()>
出力
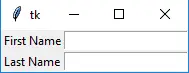
3. エントリ
ユーザーからの単一行のテキスト入力を入力するために使用されます。複数行のテキスト入力には、テキスト ウィジェットが使用されます。一般的な構文は次のとおりです。
w=Entry(master, option=value)>
master は、親ウィンドウを表すために使用されるパラメータです。ウィジェットの形式を変更するために使用されるオプションが多数あります。オプションの数は、カンマで区切られたパラメータとして渡すことができます。その一部を以下に示します。
Python3 from tkinter import * master = Tk() Label(master, text='First Name').grid(row=0) Label(master, text='Last Name').grid(row=1) e1 = Entry(master) e2 = Entry(master) e1.grid(row=0, column=1) e2.grid(row=1, column=1) mainloop()>
出力
属性エラーPython
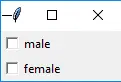
4. チェックボタン
多数のオプションをトグル ボタンとしてユーザーに表示することで、任意の数のオプションを選択します。一般的な構文は次のとおりです。
w = CheckButton(master, option=value)>
このウィジェットの形式を変更するために使用されるオプションが多数あります。オプションの数は、カンマで区切られたパラメータとして渡すことができます。その一部を以下に示します。
Python3 from tkinter import * master = Tk() var1 = IntVar() Checkbutton(master, text='male', variable=var1).grid(row=0, sticky=W) var2 = IntVar() Checkbutton(master, text='female', variable=var2).grid(row=1, sticky=W) mainloop()>
出力
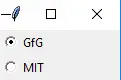
5. ラジオボタン
ユーザーに複数の選択肢を提供するために使用されます。ユーザーにいくつかのオプションが提供され、ユーザーは 1 つのオプションを選択する必要があります。一般的な構文は次のとおりです。
w = RadioButton(master, option=value)>
このウィジェットの形式を変更するために使用されるオプションが多数あります。オプションの数は、カンマで区切られたパラメータとして渡すことができます。その一部を以下に示します。
Python3 from tkinter import * root = Tk() v = IntVar() Radiobutton(root, text='GfG', variable=v, value=1).pack(anchor=W) Radiobutton(root, text='MIT', variable=v, value=2).pack(anchor=W) mainloop()>
出力
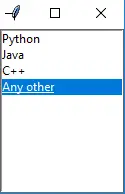
6. リストボックス
これは、ユーザーが任意の数のオプションを受け入れることができるリストをユーザーに提供します。一般的な構文は次のとおりです。
w = Listbox(master, option=value) master is the parameter used to represent the parent window.>
ウィジェットの形式を変更するために使用されるオプションが多数あります。オプションの数は、カンマで区切られたパラメータとして渡すことができます。その一部を以下に示します。
Python3 from tkinter import * top = Tk() Lb = Listbox(top) Lb.insert(1, 'Python') Lb.insert(2, 'Java') Lb.insert(3, 'C++') Lb.insert(4, 'Any other') Lb.pack() top.mainloop()>
出力
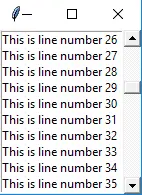
7。 スクロール・バー
これは、リストされたウィジェットを実装するために使用されるスライド コントローラーを指します。一般的な構文は次のとおりです。
w = Scrollbar(master, option=value) master is the parameter used to represent the parent window.>
ウィジェットの形式を変更するために使用されるオプションが多数あります。オプションの数は、カンマで区切られたパラメータとして渡すことができます。その一部を以下に示します。
Python3 from tkinter import * root = Tk() scrollbar = Scrollbar(root) scrollbar.pack(side=RIGHT, fill=Y) mylist = Listbox(root, yscrollcommand=scrollbar.set) for line in range(100): mylist.insert(END, 'This is line number' + str(line)) mylist.pack(side=LEFT, fill=BOTH) scrollbar.config(command=mylist.yview) mainloop()>
出力
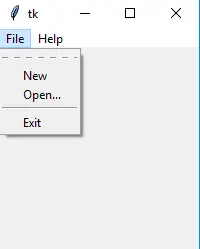
8. メニュー
アプリケーションで使用されるあらゆる種類のメニューを作成するために使用されます。一般的な構文は次のとおりです。
w = Menu(master, option=value) master is the parameter used to represent the parent window.>
このウィジェットの形式を変更するために使用されるオプションが多数あります。オプションの数は、カンマで区切られたパラメータとして渡すことができます。その一部を以下に示します。
Python3 from tkinter import * root = Tk() menu = Menu(root) root.config(menu=menu) filemenu = Menu(menu) menu.add_cascade(label='File', menu=filemenu) filemenu.add_command(label='New') filemenu.add_command(label='Open...') filemenu.add_separator() filemenu.add_command(label='Exit', command=root.quit) helpmenu = Menu(menu) menu.add_cascade(label='Help', menu=helpmenu) helpmenu.add_command(label='About') mainloop()>
出力
9. コンボボックス
Combobox ウィジェットは、tkinter.ttk モジュールの ttk.Combobox クラスを使用して作成されます。コンボボックスの値は、values パラメーターを使用して指定します。デフォルト値は set メソッドを使用して設定されます。イベント ハンドラー関数 on_select は、bind メソッドを使用してコンボボックスにバインドされており、項目が選択されるたびに、選択された項目のラベルが更新されます。
Python3 import tkinter as tk from tkinter import ttk def on_select(event): selected_item = combo_box.get() label.config(text='Selected Item: ' + selected_item) root = tk.Tk() root.title('Combobox Example') # Create a label label = tk.Label(root, text='Selected Item: ') label.pack(pady=10) # Create a Combobox widget combo_box = ttk.Combobox(root, values=['Option 1', 'Option 2', 'Option 3']) combo_box.pack(pady=5) # Set default value combo_box.set('Option 1') # Bind event to selection combo_box.bind('<>', on_select) root.mainloop()>> 出力

個人利用におけるインスタグラムのメリット
10. 規模
これは、そのスケールから任意の値を選択できるグラフィカル スライダーを提供するために使用されます。一般的な構文は次のとおりです。
w = Scale(master, option=value)master is the parameter used to represent the parent window.>
ウィジェットの形式を変更するために使用されるオプションが多数あります。オプションの数は、カンマで区切られたパラメータとして渡すことができます。その一部を以下に示します。
Python3 from tkinter import * master = Tk() w = Scale(master, from_=0, to=42) w.pack() w = Scale(master, from_=0, to=200, orient=HORIZONTAL) w.pack() mainloop()>
出力
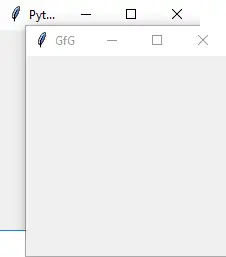
十一。 トップレベル
このウィジェットはウィンドウ マネージャーによって直接制御されます。作業するために親ウィンドウは必要ありません。一般的な構文は次のとおりです。
w = TopLevel(master, option=value)>
ウィジェットの形式を変更するために使用されるオプションが多数あります。オプションの数は、カンマで区切られたパラメータとして渡すことができます。その一部を以下に示します。
Python3 from tkinter import * root = Tk() root.title('GfG') top = Toplevel() top.title('Python') top.mainloop()> 出力
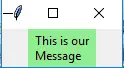
12. メッセージ
複数行の編集不可能なテキストを指します。ラベルと同じように機能します。一般的な構文は次のとおりです。
w = Message(master, option=value) master is the parameter used to represent the parent window.>
ウィジェットの形式を変更するために使用されるオプションが多数あります。オプションの数は、カンマで区切られたパラメータとして渡すことができます。その一部を以下に示します。
Python3 from tkinter import * main = Tk() ourMessage = 'This is our Message' messageVar = Message(main, text=ourMessage) messageVar.config(bg='lightgreen') messageVar.pack() main.mainloop()>
出力
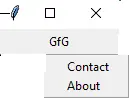
13. メニューボタン
これは、ウィンドウに常に表示されるトップダウン メニューの一部です。すべてのメニューボタンには独自の機能があります。一般的な構文は次のとおりです。
w = MenuButton(master, option=value) master is the parameter used to represent the parent window.>
ウィジェットの形式を変更するために使用されるオプションが多数あります。オプションの数は、カンマで区切られたパラメータとして渡すことができます。その一部を以下に示します。
Python3 from tkinter import * top = Tk() mb = Menubutton ( top, text = 'GfG') mb.grid() mb.menu = Menu ( mb, tearoff = 0 ) mb['menu'] = mb.menu cVar = IntVar() aVar = IntVar() mb.menu.add_checkbutton ( label ='Contact', variable = cVar ) mb.menu.add_checkbutton ( label = 'About', variable = aVar ) mb.pack() top.mainloop()>
出力
14. プログレスバー
Progressbar ウィジェットと進行状況を開始するボタンを備えた Tkinter アプリケーション。ボタンをクリックすると、プログレスバーが短期間で最大 100% まで表示され、完了までに時間がかかるタスクをシミュレートします。
Python3 import tkinter as tk from tkinter import ttk import time def start_progress(): progress.start() # Simulate a task that takes time to complete for i in range(101): # Simulate some work time.sleep(0.05) progress['value'] = i # Update the GUI root.update_idletasks() progress.stop() root = tk.Tk() root.title('Progressbar Example') # Create a progressbar widget progress = ttk.Progressbar(root, orient='horizontal', length=300, mode='determinate') progress.pack(pady=20) # Button to start progress start_button = tk.Button(root, text='Start Progress', command=start_progress) start_button.pack(pady=10) root.mainloop()> 出力

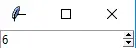
15。 スピンボックス
「エントリー」ウィジェットのエントリーです。ここで、数値の固定値を選択することで値を入力できます。一般的な構文は次のとおりです。
w = SpinBox(master, option=value)>
ウィジェットの形式を変更するために使用されるオプションが多数あります。オプションの数は、カンマで区切られたパラメータとして渡すことができます。その一部を以下に示します。
Python3 from tkinter import * master = Tk() w = Spinbox(master, from_=0, to=10) w.pack() mainloop()>
出力:
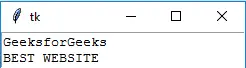
16. 文章
複数行のテキストを編集し、表示に必要な形式に設定します。一般的な構文は次のとおりです。
w =Text(master, option=value)>
テキストの形式を変更するために使用されるオプションが多数あります。オプションの数は、カンマで区切られたパラメータとして渡すことができます。その一部を以下に示します。
Python3 from tkinter import * root = Tk() T = Text(root, height=2, width=30) T.pack() T.insert(END, 'techcodeview.com
BEST WEBSITE
') mainloop()>
出力
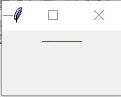
17. キャンバス
画像や、グラフィック、テキスト、ウィジェットなどの複雑なレイアウトを描画するために使用されます。一般的な構文は次のとおりです。
w = Canvas(master, option=value) master is the parameter used to represent the parent window.>
ウィジェットの形式を変更するために使用されるオプションが多数あります。オプションの数は、カンマで区切られたパラメータとして渡すことができます。その一部を以下に示します。
Python3 from tkinter import * master = Tk() w = Canvas(master, width=40, height=60) w.pack() canvas_height=20 canvas_width=200 y = int(canvas_height / 2) w.create_line(0, y, canvas_width, y ) mainloop()>
出力
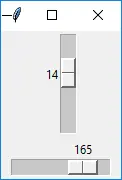
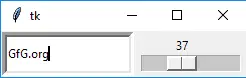
18. パンされたウィンドウ
コンテナ内に配置されたペインの数を処理するために使用されるコンテナ ウィジェットです。一般的な構文は次のとおりです。
w = PannedWindow(master, option=value)>
Master は、親ウィンドウを表すために使用されるパラメータです。ウィジェットの形式を変更するために使用されるオプションが多数あります。オプションの数は、カンマで区切られたパラメータとして渡すことができます。その一部を以下に示します。
Python3 from tkinter import * m1 = PanedWindow() m1.pack(fill=BOTH, expand=1) left = Entry(m1, bd=5) m1.add(left) m2 = PanedWindow(m1, orient=VERTICAL) m1.add(m2) top = Scale(m2, orient=HORIZONTAL) m2.add(top) mainloop()>
出力
Tkinter のカラー オプション
この例では、アクティブな背景色と前景色、背景色と前景色、無効な状態の色、選択色など、Tkinter ウィジェットのさまざまなカラー オプションの使用法を示します。例の各ウィジェットは異なる色のオプションを示しており、これらのオプションがウィジェットの外観にどのような影響を与えるかを視覚的に表現しています。
Python3 import tkinter as tk root = tk.Tk() root.title('Color Options in Tkinter') # Create a button with active background and foreground colors button = tk.Button(root, text='Click Me', activebackground='blue', activeforeground='white') button.pack() # Create a label with background and foreground colors label = tk.Label(root, text='Hello, Tkinter!', bg='lightgray', fg='black') label.pack() # Create an Entry widget with selection colors entry = tk.Entry(root, selectbackground='lightblue', selectforeground='black') entry.pack() root.mainloop()> 出力
フォントを改善するための詳細: Tkinter フォント
形状管理
Tkinter は、親ウィンドウ内のウィジェットを整理できるウィジェットの幾何学的構成へのアクセスも提供します。ジオメトリ マネージャー クラスは主に 3 つあります。
Pack() メソッド
親ウィジェットに配置する前に、ウィジェットをブロックに整理します。
カイリー・ジェンナーは何歳ですかPython3
import tkinter as tk root = tk.Tk() root.title('Pack Example') # Create three buttons button1 = tk.Button(root, text='Button 1') button2 = tk.Button(root, text='Button 2') button3 = tk.Button(root, text='Button 3') # Pack the buttons vertically button1.pack() button2.pack() button3.pack() root.mainloop()> 出力

グリッド()メソッド
親ウィジェットに配置する前に、ウィジェットをグリッド (テーブルのような構造) に編成します。
Python3 import tkinter as tk root = tk.Tk() root.title('Grid Example') # Create three labels label1 = tk.Label(root, text='Label 1') label2 = tk.Label(root, text='Label 2') label3 = tk.Label(root, text='Label 3') # Grid the labels in a 2x2 grid label1.grid(row=0, column=0) label2.grid(row=0, column=1) label3.grid(row=1, column=0, columnspan=2) root.mainloop()> 出力

place() メソッド
プログラマが指示した特定の位置にウィジェットを配置することで、ウィジェットを整理します。
Python3 import tkinter as tk root = tk.Tk() root.title('Place Example') # Create a label label = tk.Label(root, text='Label') # Place the label at specific coordinates label.place(x=50, y=50) root.mainloop()> 出力
